Creating a site in SharePoint involves several steps that ensure the site is configured to meet your organization’s needs. Here’s a step-by-step guide to creating a SharePoint site:
Follow the given steps to Creating a SharePoint Online Site
1. Access SharePoint
- Log In: Start by logging into your Office 365 account.
- Navigate to SharePoint: Once logged in, go to the SharePoint application. This can typically be found in the app launcher (the grid icon in the upper-left corner).

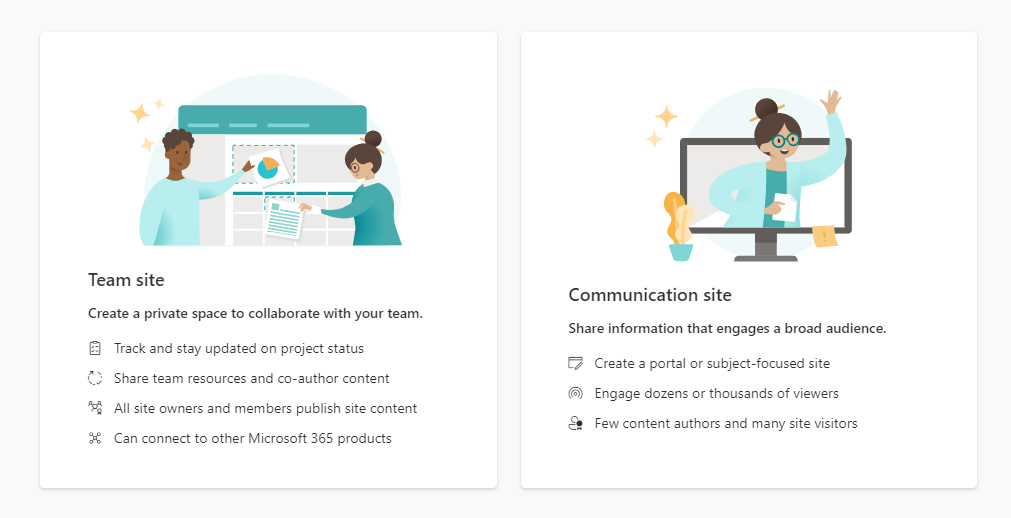
2. Choose the Type of Site to Create
- Types of Sites: You can create either a Team Site or a Communication Site.
- Team Site: Ideal for collaboration among team members, offering features like document libraries, task lists, and calendars.
- Communication Site: Designed for broadcasting information to a wider audience, with features that support news articles, reports, and other communications.
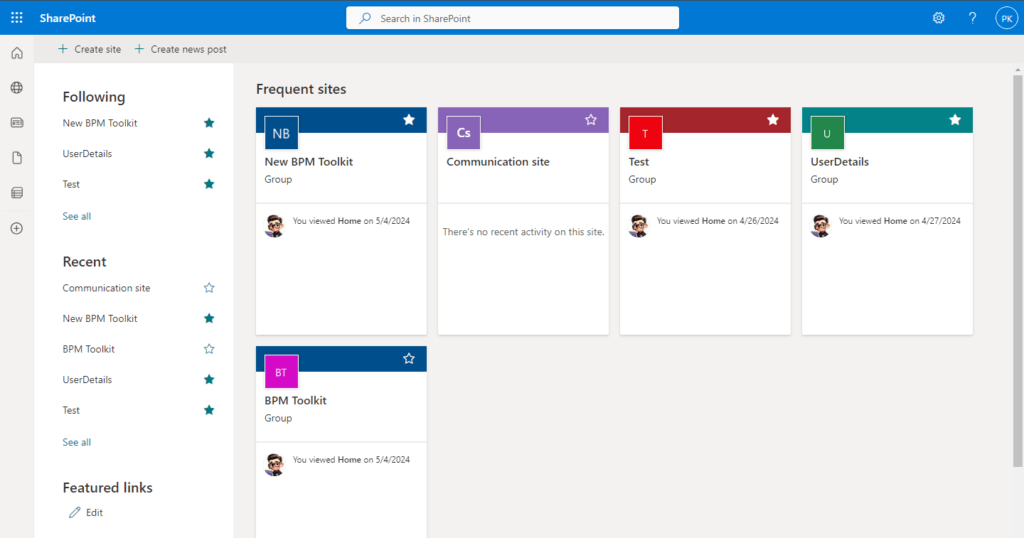
3. Start the Site Creation Process
- Create a Site: From the SharePoint homepage, click on the “+ Create site” button.
4. Select the Site Type
- Select Type: Choose whether you want to create a Team Site or a Communication Site.
- For a Team Site, you might see options to create a site with an existing Microsoft 365 group or to create a standalone site.
- For a Communication Site, choose from different layout options (e.g., Topic, Showcase, or Blank).
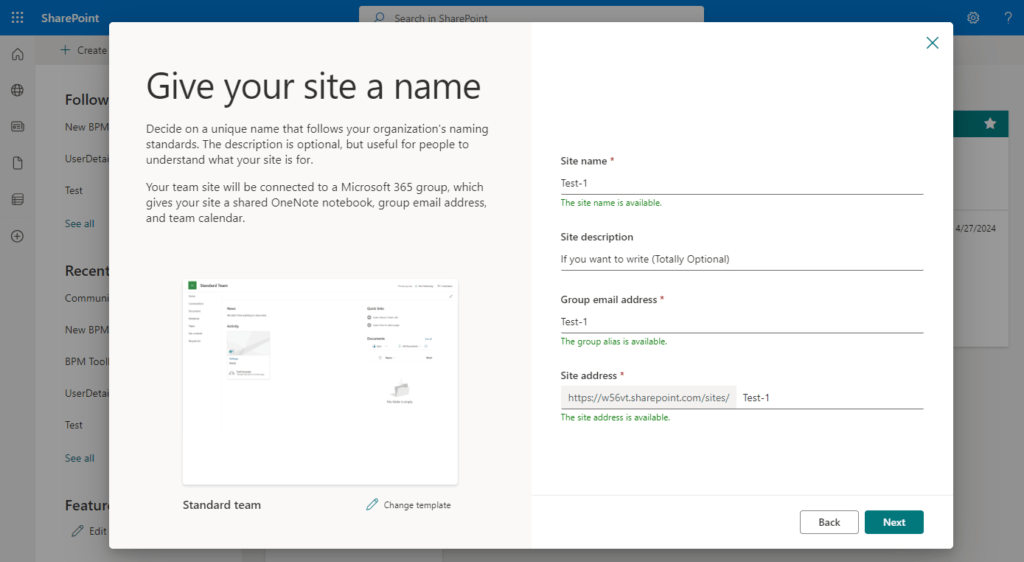
5. Configure Site Settings
- Site Name: Enter a name for your site. This will also create a corresponding email address for the site.
- Group Email Address (for Team Sites): This will be generated based on your site name. You can edit it if necessary.
- Site Description: Provide a brief description of the site’s purpose.
- Privacy Settings (for Team Sites): Choose whether the site will be Public (anyone in the organization can access it) or Private (only members can access it).
- Site Address: SharePoint will create a URL based on your site name. You can customize this if needed.
- Language: Choose the default language for your site.

6. Additional Settings
- Additional Owners: You can add other owners for the site.
- Members: For Team Sites, you can add members who will have access to the site.
- Site Classification: If your organization uses site classifications, select the appropriate classification (e.g., Confidential, General).
7. Create the Site
- Finish and Create: After filling in the necessary details, click the “Finish” button (for Team Sites) or “Create” button (for Communication Sites). SharePoint will set up your site, which might take a few moments.

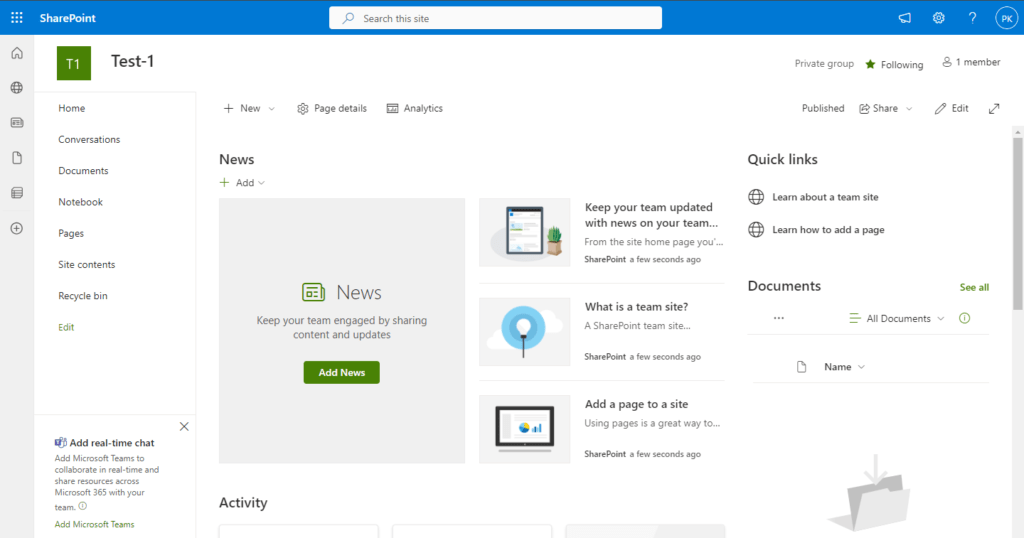
8. Customize Your Site
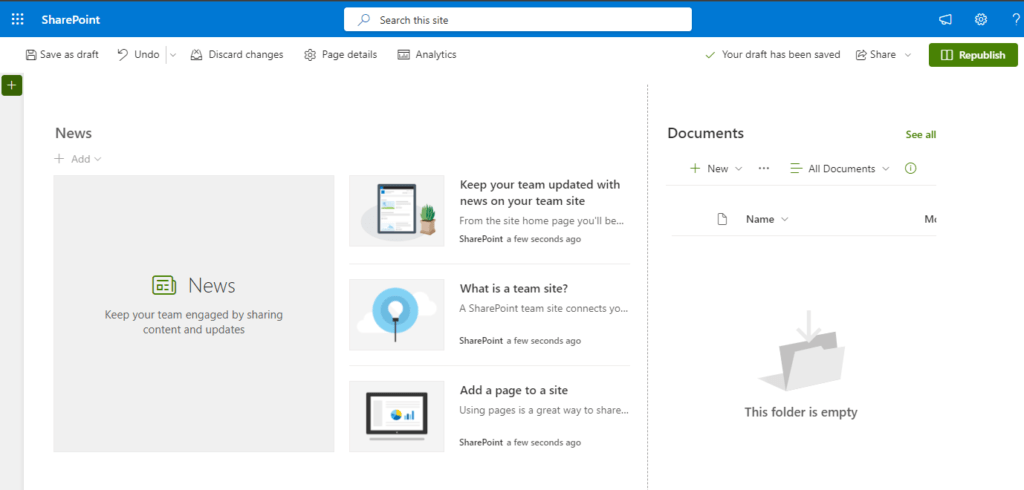
- Homepage Customization: Once the site is created, you will be taken to the homepage. Here, you can customize the look and feel of the site using the provided templates and web parts.
- Edit the Homepage: Click on “Edit” to customize the layout, add web parts (like text, images, documents, lists, etc.), and configure their settings.
- Change the Theme: You can modify the site’s theme by going to the Settings gear icon > Change the look > Theme.
9. Configure Site Settings
- Site Settings: Access additional site settings by clicking the Settings gear icon > Site information or Site settings. Here, you can configure permissions, regional settings, site usage data, and more.
10. Add Content and Web Parts
- Document Libraries: Create and configure document libraries to store files.
- Lists: Create lists to manage tasks, contacts, or other types of information.
- Web Parts: Add various web parts to your pages, such as news feeds, document libraries, lists, image galleries, and more.

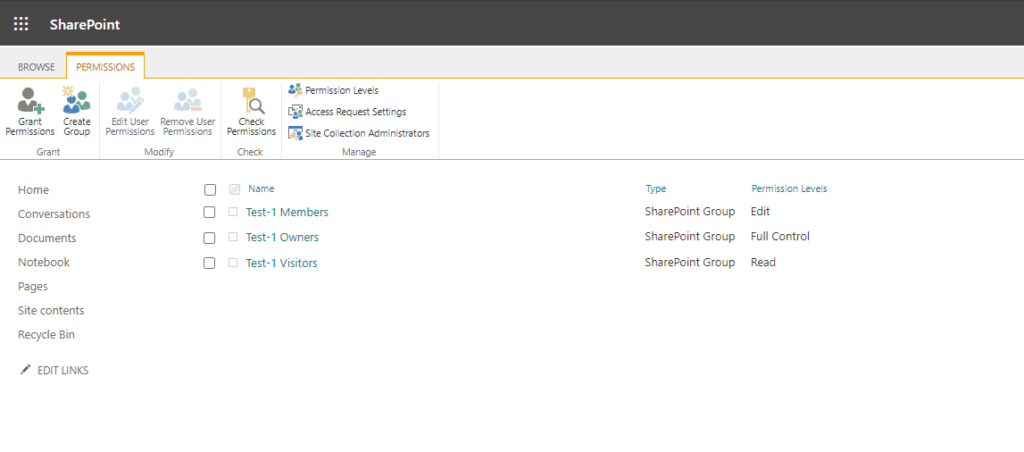
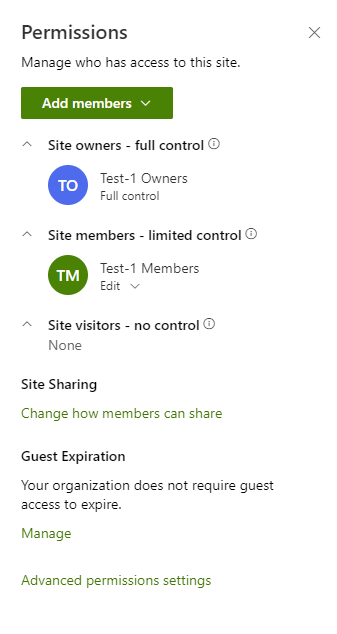
11. Set Permissions
- Manage Permissions: Go to Settings > Site permissions to manage who can view and edit the site. You can add or remove users and configure their permission levels (e.g., Full Control, Edit, Read).
12. Publish Your Site
- Publish Changes: After making customizations, ensure you publish the site to make it available to your users.
Conclusion
Creating a SharePoint site involves selecting the appropriate site type, configuring essential settings, and customizing the site to meet your needs. By following these steps, you can set up a collaborative or communication platform that supports your team’s productivity and information sharing.
I think the admin of this website is in fact working hard in support off his website, for the reason that here every material is quality based material.
Thank you very much for your genuine words @Rae